Easy Sweets to Make and Share
Published in America's Test Kitchen
Happy Sweetest Day!
What? You've never heard of Sweetest Day? Well, to tell you the truth, until recently neither had I.
But last fall, I finally learned about it from some of my fellow cooks who grew up in the Great Lakes region. Apparently, Sweetest Day started in Cleveland, Ohio in 1921 as a way to encourage giving and eating candy. It never caught on as a national event, but in parts of the northern Midwest it's still observed each year on the third Saturday of October -- even though some cynics say it's just a business promotion.
To which I say: What's wrong with another good excuse to eat sweets?
That doesn't mean you have to go out and buy candy this October 17. I always like to make my own, especially when it's the easy recipe I share here for a long-popular recipe from my Spago restaurant, featuring the widely loved combination of chocolate and peanut butter. (And, by the way, I know that some people out there are severely allergic to peanuts. This recipe also works great with other nut butters you can buy in well-stocked markets and health food stores, including almond butter and cashew butter.)
Unlike most American children, I didn't grow up eating peanut butter in Austria. And though I never became a fan of peanut butter and jelly sandwiches after I moved here as a grownup, I can understand why many American adults still secretly enjoy that childhood favorite. After all, I fell in love with peanut butter as an ingredient in desserts, cookies, and candies.
One great thing about these particular candies is that you don't really have to do any actual cooking to make them. You'll only use the stove if you melt the chocolate as described in the recipe.
But, in fact, you don't even need a stove. If you prefer, you can melt the chocolate in the microwave. Put the chopped chocolate in a microwave-safe mixing bowl. Heat on the medium power setting for 1 minute. Then check to see if it looks soft and shiny, a sign that it's ready for stirring. If not, continue heating at 30-second intervals until it does, keeping a close watch to avoid scorching it. Finally, stir the soft, shiny chocolate, which will turn smooth and fluid.
Unlike some chocolate candy recipes, there's no dipping involved, either. You just spoon the melted chocolate directly over the peanut butter centers, which you've already shaped and placed in individual little cups. Refrigerate until set, and you've got treats that will literally melt in your mouth.
They're so good, you won't want to make them just for Sweetest Day, either. Remember: Halloween and the holiday season are just around the corner!
CHOCOLATE-COVERED PEANUT BUTTER CUPS
Makes about 28 miniature cups
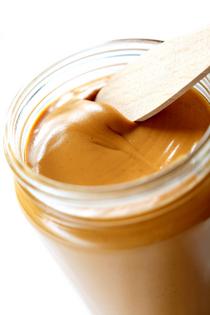
1 cup creamy organic peanut butter
1 cup confectioners' sugar, sifted
3 tablespoons very soft unsalted butter, cut into small pieces
1 tablespoon milk
1 tablespoon pure vanilla extract
1/2 teaspoon salt
12 ounces semisweet chocolate, cut into small pieces, or milk chocolate plus 1 tablespoon flavorless vegetable oil
In a medium mixing bowl, combine the peanut butter, sugar, butter, milk, vanilla, and salt. Using a rubber spatula, stir and mash the ingredients together until evenly combined and very smooth. Cover the bowl with plastic wrap and refrigerate until firm, at least 1 hour.
Put the semisweet chocolate, or the milk chocolate and vegetable oil, in a medium metal bowl large enough to rest inside the rim of a medium saucepan. Bring about 1-1/2 inches of water to a boil in the saucepan; and reduce the heat to maintain the barest simmer. Rest the metal bowl on the rim, making sure its bottom does not actually touch the simmering water below. Stir the chocolate with a wooden spoon as it melts. When it is almost completely melted, turn off the heat and let the chocolate continue to melt, stirring occasionally, until completely melted and smooth. Keep the bowl over the warm water.
Arrange 28 or so miniature paper or foil candy cups on a baking sheet. With a teaspoon, scoop up about 1/2 ounce of the peanut butter mixture and, with your hands, gently roll it into a smooth, bite-sized ball slightly smaller in circumference than the height of the cups. (If you like, check the weight on a kitchen scale.) Set the ball inside a cup and repeat with the remaining mixture.
Using a small spoon, carefully spoon the melted chocolate into each cup to cover the peanut butter balls. Transfer the baking sheet to the refrigerator and refrigerate until the chocolate is firmly set, about 1 hour. The cups will keep at least 2 weeks, refrigerated in a covered container.
(c) 2009 WOLFGANG PUCK WORLDWIDE, INC. DISTRIBUTED BY TRIBUNE MEDIA SERVICES, INC.


Comments